iOS15から現在位置を渡せるPermissionが追加されたzo!
はじめに
WWDCのMeet the Location Buttonというセッションの中で位置情報のPermissionがiOS15から新しく簡単に許可できるUIが追加されました。
追加された経緯としては現在はiOS13で更新された一度だけ許可、アプリを使用中は許可、許可しないの3つの状態が選べるようになっていると思いますが、一度だけ許可をした場合もアプリをバックグラウンドにした際許可がなくなってしまい、再度開いた時に許可をしないといけないのでユーザが本当に使いタイミングでできていない。許可をしなかった場合はそれ以降位置情報が使えないのでユーザ体験を損ねてしまう可能性がある、そのため任意のタイミングで現在位置を一度だけ送るボタンを追加するよ〜!というものでした。
スピーカーのお姉さんが僕のドストライクで見惚れながら聞いていたわけですが、CoreLocationのPermissionには以前苦しんだ覚えがあるのでどんな感じなのか試してみました。
セッションで紹介されてたコード
セッションの中ではこんな感じでUIKit,SwiftUIそれぞれ使えばいいよー👌と言っていました。
UIKit
let button = CLLocationButton()
button.label = .currentLocation
button.addTarget(self, action: #selector(showParks), for: .touchUpInside)

// ...

@objc func showParks() {
  // Not needed, called by the button itself
  // self.locationManager.requestWhenInUseAuthorization()

  self.locationManager.startUpdatingLocation()
}
SwiftUI
LocationButton(.currentLocation) {
    // do something on button press ..
}.forgroundColor(.white)
 .cornerRadius(15.0)
 .labelStyle(.titleAndIcon)
 .symbolValiant(.fill)
 .tint(.blue)
ためしてみたよ
作ったサンプルの挙動
勘違いしていたこと
まず、試す前はPermissionを拒否していてもボタンを押したら勝手に取れるようになると思っていたのですがこれは違います!!!
ios13からの3つの選択肢のうち常に許可を押した場合はその名の通り常に許可状態になるのでCLLocationButtonのタップに関わらず位置情報が取得可能です。
対して許可しないを選択した場合ですが、CLLocationButtonをタップしても許可されず位置情報を使うことはできません。🚨👮♀️
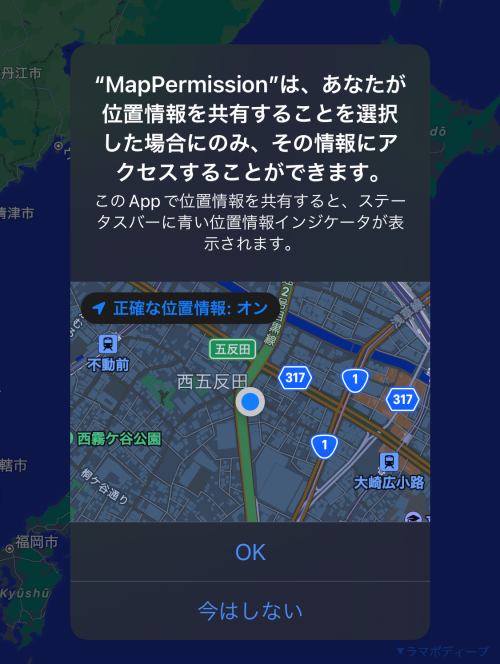
CLLocadtionButtonをタップすると次の画像のようなダイアログが表示され、OKを選択すると位置情報が取れるのですが、設定画面では次回確認のステータスになっています。

このことから、CLLocationButtonを使う際にはlocationManager.requestAlwaysAuthorization()を呼んではいけないんだと思います。(Permissionがバッティングするので。)
IBからは追加できない?
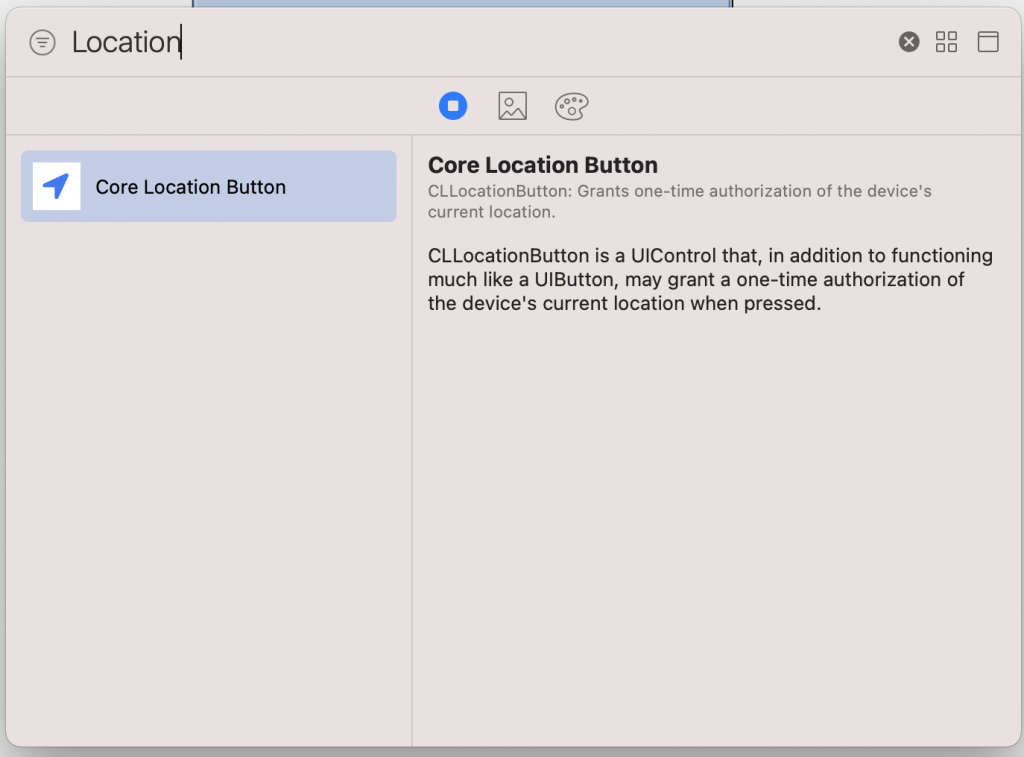
IB上でも次の画像のようにCore Location Buttonが用意されており配置することは可能です。

しかし、ビルドした際の以下のエラーを吐いてクラッシュしてしまいました😭
Terminating app due to uncaught exception 'NSInvalidUnarchiveOperationException',
reason: 'Could not instantiate class named CLLocationButton because no class named
CLLocationButton was found; the class needs to be defined in source code or linked in
from a library (ensure the class is part of the correct target)'
terminating with uncaught exception of type NSException
あとIBで追加した場合outle接続はできるのですが、actionでViewControllerと接続することができませんでした。謎🤔
コード
つまづきポイント
簡単なので基本的につまづくことはないと思いますが、CLLocationButtonはCoreLocationUIというライブラリに内包されているのでimportが必要です!
セッションをなんとなーく聞いていてここを聞き逃していたので5分くらい悩みました…。
import CoreLocationUIボタンのレイアウトについて
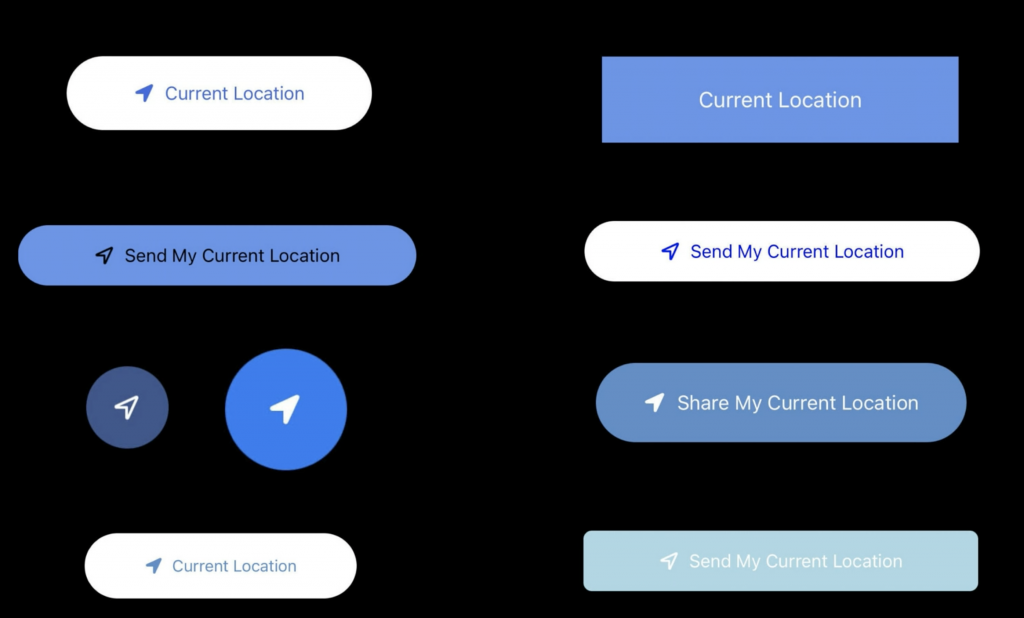
文字サイズが大きすぎたり、文言が長すぎてボタンの中から見切れてしまうなどなければ基本的に自由に作って良い感じでした。
セッション内で紹介されていたボタンのカスタマイズの例はこんな感じ!

コード一覧
import UIKit
import MapKit
import CoreLocation
import CoreLocationUI

class ViewController: UIViewController {

    @IBOutlet weak var mapView: MKMapView!

    var locationManager = CLLocationManager()

    override func viewDidLoad() {
        super.viewDidLoad()

        locationManager.delegate = self
        createLocationButton()
    }

    private func createLocationButton() {
        let button = CLLocationButton(frame: CGRect(x: 0,
                                                    y: 0,
                                                    width: self.view.frame.width/2,
                                                    height: 50))
        button.label = .currentLocation
        button.icon = .arrowFilled
        button.cornerRadius = 12
        button.center = CGPoint(x: view.center.x,
                                y: view.center.y + 300)
        self.view.addSubview(button)
        button.addTarget(self, action: #selector(requestCurrentLocation), for: .touchUpInside)

    }

    @objc func requestCurrentLocation() {
        self.locationManager.startUpdatingLocation()
    }

}

extension ViewController: CLLocationManagerDelegate {
    func locationManager(_ manager: CLLocationManager, didUpdateLocations locations: [CLLocation]) {
        guard let location = locations.first else { return }
        locationManager.stopUpdatingLocation()

        var region: MKCoordinateRegion = mapView.region
        region.center = CLLocationCoordinate2D(latitude: location.coordinate.latitude,
                                               longitude: location.coordinate.longitude)
        region.span.latitudeDelta = 0.02
        region.span.longitudeDelta = 0.02
        mapView.setRegion(region, animated: true)
    }
}
