List
はじめに
UIKitのUITableViewのように1行ずつのセルを子Viewで表示してスクロール可能なViewです。
SectionもUIKitのものより簡単に追加できます。
List
List<SelectionValue, Content>という構造体が用意されているのでListの中括弧の中にHStackでcell用のViewを作成していくと1つの塊がcellになります。
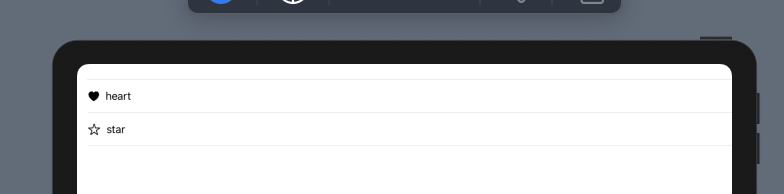
struct ContentView: View {
    var body: some View {
        List {
            HStack {
                Image(systemName: "heart.fill")
                Text("heart")
            }
            HStack {
                Image(systemName: "star")
                Text("star")
            }
        }
    }
}
section
Sectionのinitializeは以下の4種類が用意されています。
Section(content: )
Section(footer: , content: )
Section(header: , content: )
Section(header: , footer: , content: )
以下のようなコードでSection HeaderとFooterを追加すると画像のようにHeader,Footerが追加されます。
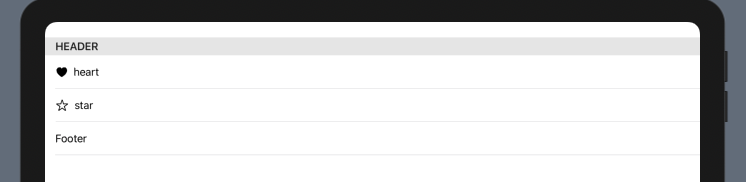
struct ContentView: View {
    var body: some View {
        List {
            Section(header: Text("Header"), footer: Text("Footer")) {
                HStack {
                    Image(systemName: "heart.fill")
                    Text("heart")
                }
                HStack {
                    Image(systemName: "star")
                    Text("star")
                }
            }
        }
    }
}