fastlaneでsnapshotを取る!
はじめに
Fastlaneを使ってscreenshotを撮影するだけのlaneを作る方法です。
まとめている記事がいくつかあるのですが結構ハマってしまったので出来るだけシンプルにまとめようと思います。
Fastlaneの作成
Fastlaneでipaを吐き出してみるでインストール方法はまとめたのでインストールはスキップします。
作成コマンド
bundle exec fastlane initテンプレートを作ってもらえるので1を選択

入れるアプリを選択、今回は複数個ないので必然的に1

アップルストアへの自動アップロード有無、今回はシンプルにしたいのでn

生成されたファイルの確認と修正
Fastfileの中にスクリーンショット撮影用のlaneが生成されています
lane :screenshots do
    capture_screenshots(scheme: "SnapShotTest")
end
Snapfileなるものが生成されています。そして初期段階では全てコメントアウトされているはずです。
コメントアウトを外して以下の環境で撮影してみます。端末も言語も複数指定可能です。
端末:iPhone X
言語:en-US
出力先:./screenshots
# Uncomment the lines below you want to change by removing the # in the beginning

# A list of devices you want to take the screenshots from
 devices([
#   "iPhone 8",
#   "iPhone 8 Plus",
#   "iPhone SE",
   "iPhone X"
#   "iPad Pro (12.9-inch)",
#   "iPad Pro (9.7-inch)",
#   "Apple TV 1080p"
 ])

 languages([
   "en-US"
#   "de-DE",
#   "it-IT",
#   ["pt", "pt_BR"] # Portuguese with Brazilian locale
 ])

# The name of the scheme which contains the UI Tests
# scheme("SchemeName")

# Where should the resulting screenshots be stored?
 output_directory("./screenshots")

# remove the '#' to clear all previously generated screenshots before creating new ones
 clear_previous_screenshots(true)

# Arguments to pass to the app on launch. See https://docs.fastlane.tools/actions/snapshot/#launch-arguments
# launch_arguments(["-favColor red"])

# For more information about all available options run
# fastlane action snapshot
注意
AppleTVなどデフォルトでインストールされていないデバイスはない状態でコマンドを実行するとコケます。
コードを記述する
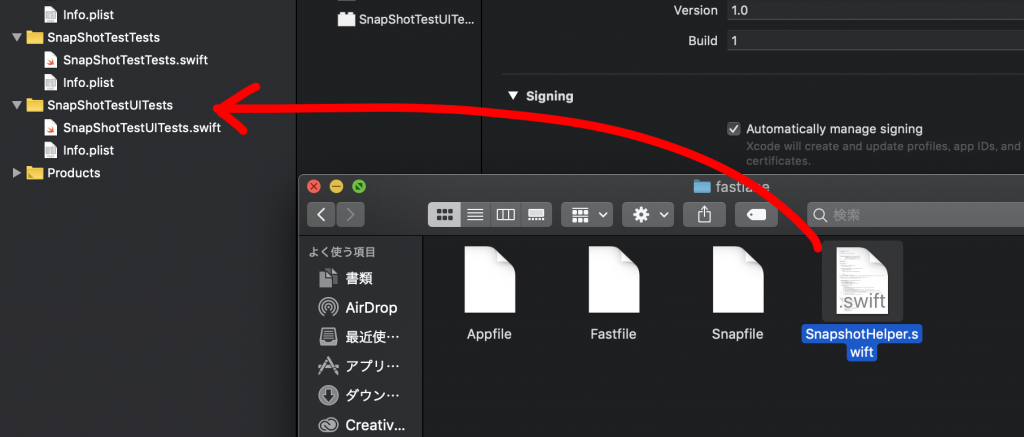
1.SnapshotHelper.swiftを参照できるようにする
fastlaneフォルダの中にSnapshotHelper.swiftというファイルが自動生成されていると思います。このままでは使えないのでプロジェクト内に入れます。
コードを書く
これでコードがかけるようになったのでUITestにコードを追記していきます。
setup()を以下のように書き換えます。
override func setUp() {
        continueAfterFailure = false
        let app = XCUIApplication()
        setupSnapshot(app)
        app.launch()
    }
初めからあるtestExample()にsnapshot()というメソッドを追加します。
func testExample() {
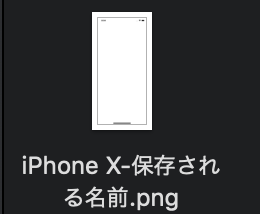
snapshot("保存される名前")
}コード全体はこんな感じです
import XCTest

class SnapShotTestUITests: XCTestCase {

    override func setUp() {
        continueAfterFailure = false
        let app = XCUIApplication()
        setupSnapshot(app)
        app.launch()
    }

    override func tearDown() {
        // Put teardown code here. This method is called after the invocation of each test method in the class.
    }

    func testExample() {
        snapshot("保存される名前")
    }
}
コマンドを実行する
snapshotを撮影する準備が整ったので以下のコマンドを実行します。
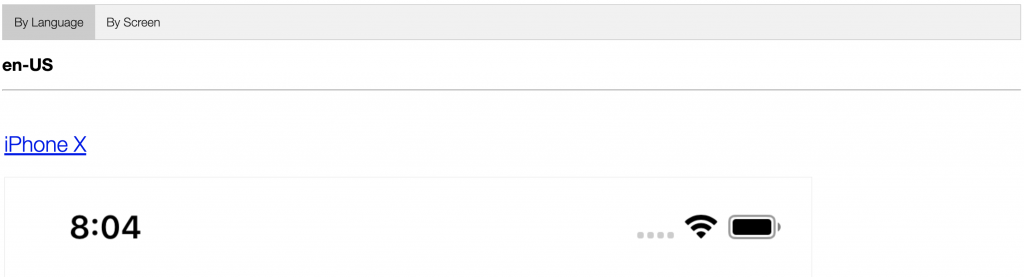
bundle exec fastlane screenshots成功すると以下の画像のようにHTMLがWebブラウザに表示されるはずです。
ここで画像が出力されていない場合はUITestのsetup()でスナップショットの初期化ができていないので確認してみてください。
プロジェクトフォルダ直下のscreenshots > en-USの中に画像が保存されているはずです。
ハマったエラー
以下のエラーが出ている場合からのHTMLは作られますが、画像が保存されません。このエラーがよくわからずハマりました。結局なんだったかというとUITestがあるはずのないボタンを押してエラーになっていました。
Caught error... 65localize対応のアプリだったのでlanguageで怒られてる!と思い込んでいましたがUITestが普通に違いました。snapshotを作成するlaneでUITestが通るかしっかり確認しましょう…
+----------+-------+
| snapshot results |
+----------+-------+
| Device   | en-US |
+----------+-------+
| iPhone X |  ❌   |
+----------+-------+