SwiftLintを使ってみる
CocoaPodで入れる
cocoaPodのインストール
sudo gem install cocoapods
pod setup
Podfileの生成
pod initSwiftLintを入れる!!!
何かしらの方法でpodfileを開く私はいつもopenを使います。vimとか使えません
open Podfileコメントとかいろいろ入ってると思いますがこんな感じに書き換えます。
プロジェクト名のところは自分のプロジェクト名にしてください。Testは作ってなかったら消しちゃって大丈夫です。
# Uncomment the next line to define a global platform for your project
platform :ios, '11.0'

target 'CocoaSwiftLintTest' do
  # Comment the next line if you're not using Swift and don't want to use dynamic frameworks
  use_frameworks!

  # Pods for CocoaSwiftLintTest
  pod 'SwiftLint'

  target 'CocoaSwiftLintTestTests' do
    inherit! :search_paths
    # Pods for testing
    pod 'SwiftLint'
  end

  target 'CocoaSwiftLintTestUITests' do
    inherit! :search_paths
    # Pods for testing
    pod 'SwiftLint'
  end

end
プロジェクトにインストール
pod installBuild時に動くようにする
赤矢印の手順に沿って設定を行います。
プロジェクト -> TARGETS -> Build Phases -> + (New Run Script Phase)
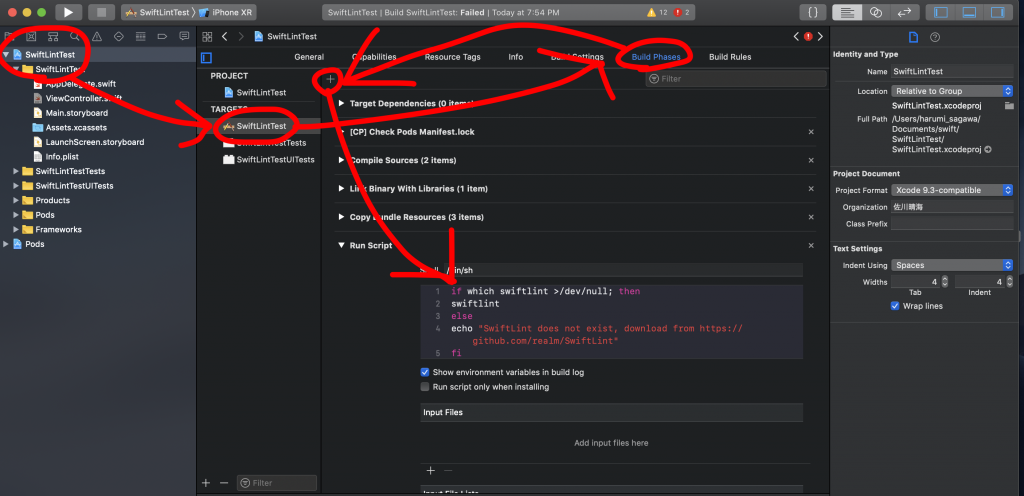

Run Scriptの中身はこんな感じです。
if which swiftlint >/dev/null; then
swiftlint
else
echo "warning: SwiftLint not installed, download from https://github.com/realm/SwiftLint"
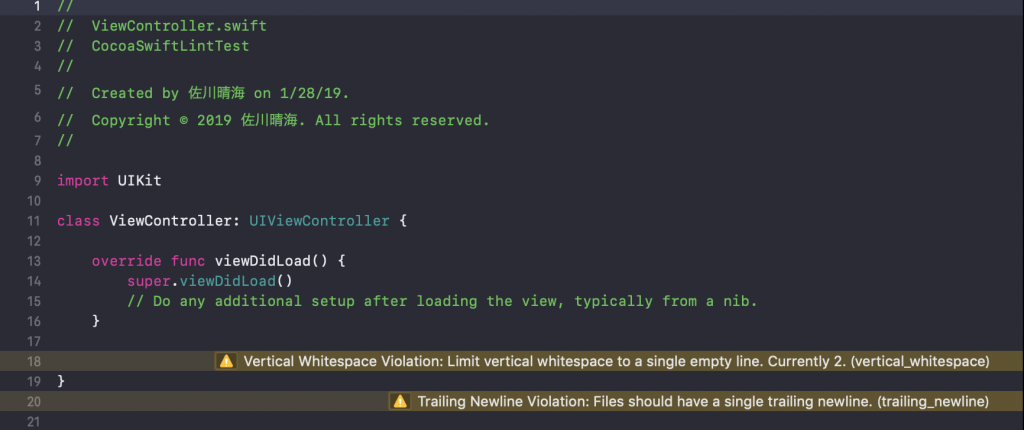
fi警告が出るはず
プロジェクトを新規で作ってこれまでの手順を踏んだ場合画像のように警告が出るようになると思います。
警告が出ていれば成功です!
おまけ
SwiftLintは一部のルールを有効にしたり無効にしたりできます。
プロジェクトのルートディレクトリに .swiftlint.ymlを作成します。私の設定しているymlファイルはこんな感じです。
included:
  - プロジェクト名/
excluded:
  - Pods/
# デフォルト無効で有効にするルール
opt_in_rules:
  - closure_spacing
  - conditional_returns_on_newline
  - empty_count
  - operator_usage_whitespace
# 無効にするルール
disabled_rules:
  - force_cast
  - force_try
line_length: 300
identifier_name:
  min_length:
    warning: 1